Editing Basic Page Content
Using the content tree on the left of the Content Editor, expand the Home panel and navigate to the page you want to edit. Alternatively, create a new basic page.
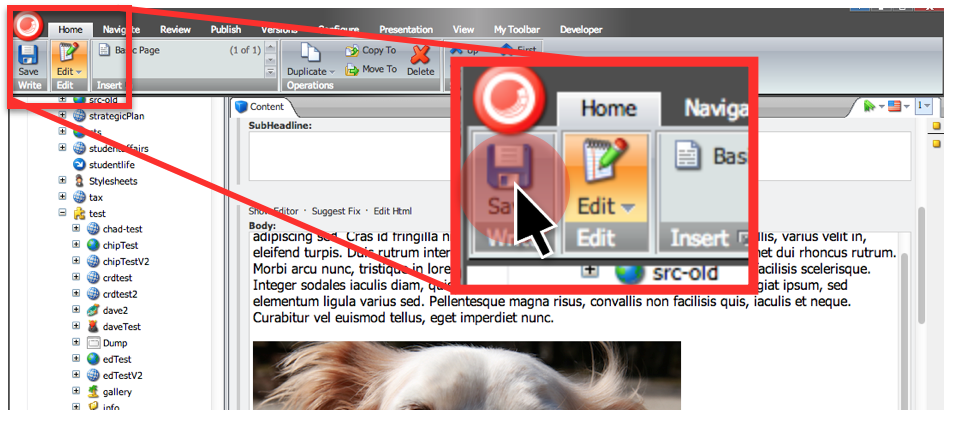
STEP 1: Lock and Edit
Click Lock and Edit at the top of the Content window. 
Locking an item prevents other users from editing it at the same time as you, and automatically creates a new version of the page that can be reverted back to. You can lock an unlimited number of pages at any given time.
Display all locked items
To display a list of all pages you currently have locked, click Review, then click My Items. You can unlock all pages simultaneously by clicking Unlock All. You can also configure the gutter settings to display locked items.
STEP 2: Locate the Appropriate Field
Every item in Sitecore is comprised of multiple text fields (plain and rich) that can be edited. All fields have their own function and are categorized into groups in the Content window (e.g., Identity, Background Config, Content, Content Image, Content Tagging, etc.).
STEP 3: Edit
Plain Text Fields
To edit, simply select the text area and type. Plain text fields do not allow for formatting. Commonly used plain text fields include the Page Title, Main Title, and Breadcrumb Title fields.
Rich Text Fields
Editing rich text fields can be done using the Text Editor or the HTML Editor. This type of field allows you to format text and to display media.
Text Editor
The Text Editor is a basic WYSIWYG (What You See is What You Get) text editor, similar to word processors like Microsoft Word. If you make some text bold, for example, it will also be bold when saved and viewed on the actual website.
HTML Editor
Users that are comfortable editing and writing HTML should use the HTML Editor since it produces consistent "as-expected" results. If you do not have experience working with HTML, do not use this editor. Visit Formatting Text for more information.
STEP 4: Save Changes
When you are finished making edits to a page, click the Save button.
This action only saves the changes that you've made; it does not publish them.
STEP 5: Check Your Work
To review your edits before publishing them, click Save, click the Review tab, and then click Display. This will open your page in a new browser window with the saved changes. Read about publishing and reviewing for more information.
Saving an item places it in Draft State. This allows you to see the changes by using Review > Display, but does not publish them to the live site. To publish an item (i.e., move an item out of Draft State), you must Approve for Publication or Submit for Review (see below).
STEP 6: Publish
Managers
Only site Managers can publish changes, making them live on the website. Select the Review tab and then click the Approve for Publication button.
Contributor
Users with Contributor or ContributorPlus accounts must select the Review tab, click Submit for Review, and then personally contact their site Manager and request that they review and approve the changes.