Using the ListServ Web Interface
ListServ 17 Interface Upgrade
Note: As of the upgrade to ListServ Version 17, there have been some visual and organizational changes to the Web Interface. The information below has been updated accordingly.
Getting Started
The first time you sign in at https://lists.drexel.edu, a cookie will be saved in your browser. This cookie will keep you signed in until you sign out or clear your browser cache.
If you own one list, you will automatically enter management of that list when you open the Web Interface.
If you own more than one list, you will see a drop-down menu under List Management > List Dashboard. Select the list you want to manage. You will enter management for that list for your duration in the Web Interface, unless you select another list, sign out, or close the browser window.
All menus can be accessed from the Navigation panel on the left. Older versions of ListServ previously had these tabs in a top Navigation bar.
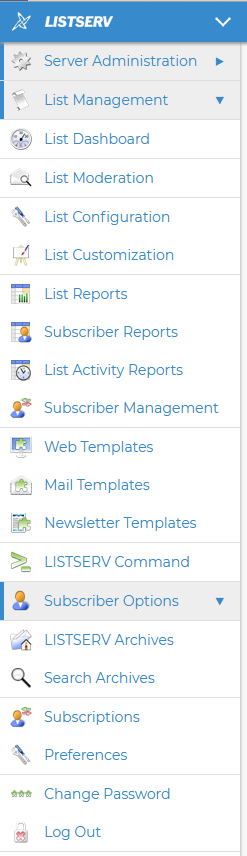
List Management Menu
The List Management menu is where you can perform all list management functions.
- List Dashboard
- List Moderation
- List Configuration
- List Customization
- List Reports
- Subscriber Reports
- List Activity Reports
- Subscriber Management
- Web Templates
- Mail Templates
- Newsletter Templates
- LISTSERV Command
Subscriber Options Menu
- LISTSERV Archives
- Search Archives
- Subscriptions
- Preferences
- Change Password
- Log Out
Managing List Subscribers
Adding Subscribers
To add a single subscriber, go to List Management > Subscriber Management. If you own more than one list, be sure to select the appropriate list from the drop-down menu on this page.
In the Email Address and Name field, enter the email address to subscribe, optionally followed by the full name, using one of the example formats in green. Click Add Subscriber.
By default, new subscribers are not notified. This is the recommended setting.
Deleting Subscribers
To delete a single subscriber, go to List Management > Subscriber Management. If you own more than one list, be sure to select the appropriate list from the drop-down menu on this page.
In the Search for Subscribers field, enter the name or email address to look up. If there's no match, you will see Scan: No Match in red.
If the subscriber is found, the subscriber options screen will load. Here you can update the subscriber's name or email address, or make changes to their subscription options.
To delete the subscriber, click Delete at the bottom of the page.
By default, subscribers are not notified of deletion. This is the recommended setting.
Bulk Operations
As of ListServ 17, Bulk Operations (adding and removing subscribers in bulk from a list) has moved.
Go to List Management > Subscriber Reports. You can add a single subscriber to list here as well, but click the link for Bulk Operations on this page to open a window with the following options:
- Add the imported addresses to the list
- Replace current subscribers with the imported addresses
- Remove the imported addresses from from the list
- Remove the imported addresses from all lists
You can attach a plain text file (.txt) to add or remove subscribers in bulk. Use the following format in your saved plain text file (first and last names are optional):
example1@drexel.edu FirstName LastName
example2@drexel.edu
example3@drexel.edu
Reviewing Subscriptions
As of ListServ 17, subscriber review options have moved.
To review what addresses are subscribed to a list, go to LISTSERV Command. Ensure the list you want to review is selected, and click Review (listname-l) under Sample Commands.
Need Help?
Contact the Mass Mailing Team at mailreq@drexel.edu.