Adding Components to a Page
Setup Summary
In general, the order of operations for adding a new component to a page is as follows. Further directions are provided below.
- Create the the desired component in the site's Extras Folder (called the "Data Source")
- On the page the component is to be added to, open Presentation > Details in the Sitecore ribbon
- Select the type of component you want to add
- Assign the component to an area on the page (called the "placeholder")
- Point the component to the previously created Data Source in the Extras Folder
- Save the page and Approve for Publication
Page Layout
Before adding a component to a page, it's important to understand Sitecore's page layouts and their respective placeholders. Commonly used page layouts are the 3 Column layout and the 2 Column - Left Nav layout.
Placeholders tell Sitecore where to include the component on the page. There are 2 commonly used placeholders:
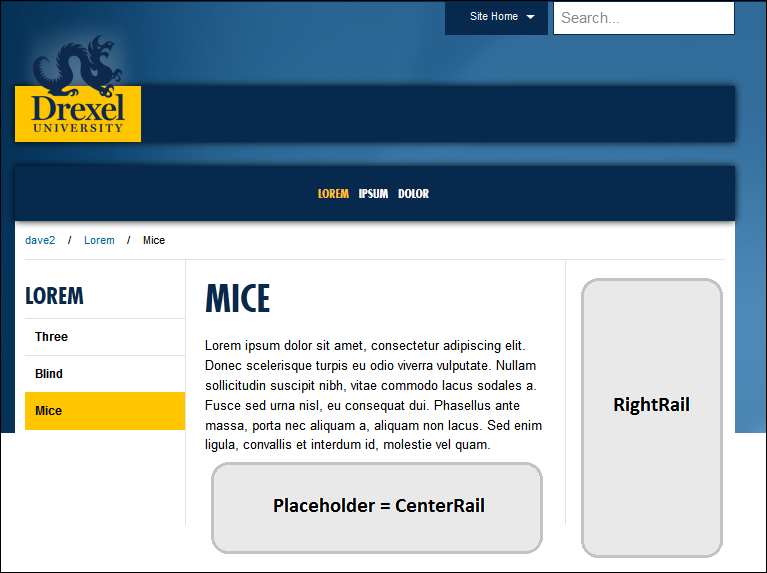
- CenterRail - placeholder for information to be included in the 2nd column of a 3 column layout
- RightRail - placholder for information to be included in the 3rd column of a 3 column layout. It is used mostly commonly for sidebars.
Adding Components to a Page
-
Select the Component to add to the page
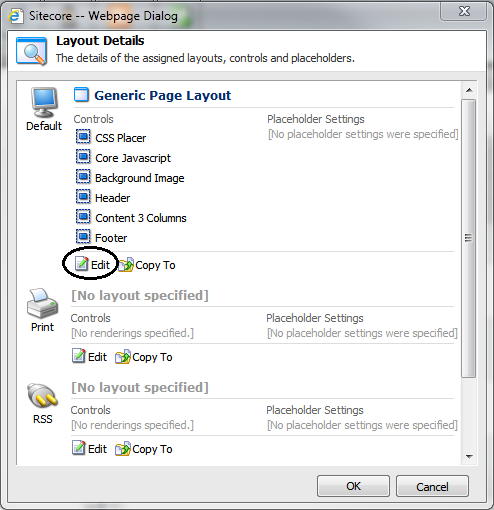
- In the Sitecore ribbon, click Presentation then Details.

- In the Layout Details dialog box, click Edit.
- The Device Editor dialog box opens. Click Controls in the list on the left, then click Add on the right.
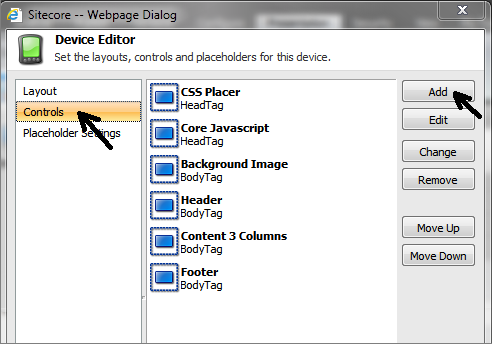
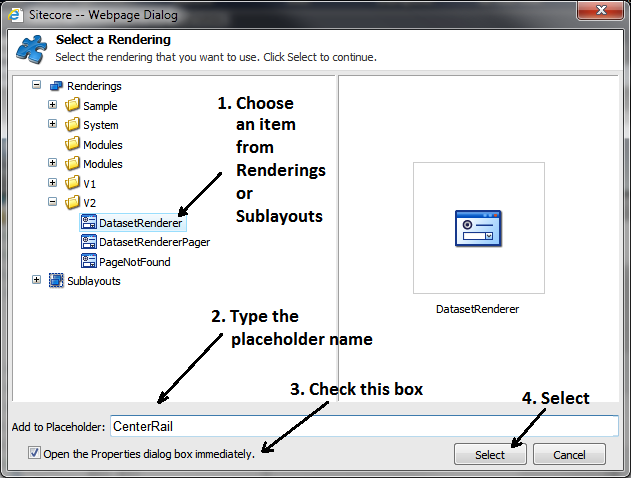
- Navigate to the component type in the Renderings or Sublayouts folder.
Datasets are the only component type found in the Renderings folder. All other components are in the Sublayouts folder.
Open the accordion below for the locations of the most commonly used components.
- Dataset Renderer
- Renderings/V2/DatasetRenderer
- FAQ
- Sublayouts/V2/Components/FAQ
- Quick Links
- Sublayouts/V2/Components/Quick Links/[LINKTYPE]
- Sidebars
- Sublayouts/V2/Sidebar/[SIDEBARTYPE]
- Slideshow
- Sublayouts/V2/Components/Slideshow
- Snippet
- Sublayouts/V2/Components/Snippet
-
Assign the component to an area on the page (the "placeholder")
- In the Add to Placeholder field, type either CenterRail or RightRail.
- Check Open the Properties dialog box, the click Select.
-
Point the Component to the Data Source in the Extras Folder
- In the Control Properties dialog box, click Insert Link.

- Navigate to the previously created component in the Extras Folder and click it.
- Click Open. The dialog box will close; click OK to close all remaining dialog boxes.
-
Preview and Publish
- To review the page, click Review in the Sitecore ribbon, then click Display.
- To publish the page, click Publish in the Sitcore ribbon, then click the Publish icon (looks like a globe).

Note: you must Publish a page after you change the Presentation Details -- this is different from the "Approve for Publication" function that you do after editing the contents of an item.